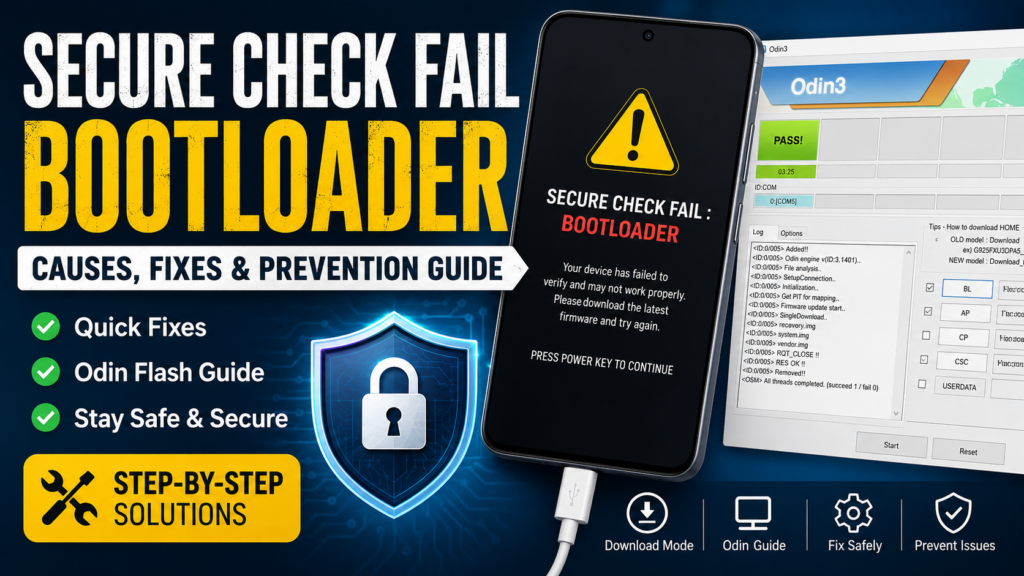
Secure Check Fail: Bootloader on Samsung & Android (Complete Fix Guide for 2026)
Seeing the “Secure Check Fail: Bootloader” error on your Samsung or Android phone? Don't panic. While this message can look intimidating, it usually doesn'
Seeing the “Secure Check Fail: Bootloader” error on your Samsung or Android phone? Don’t panic.
While this message can look intimidating, it usually doesn’t mean your phone is permanently damaged. In most cases, the problem occurs because Android’s security system detects firmware files that don’t match what the device expects during startup.
Whether the error appeared after a failed update, an interrupted Odin flash, rooting attempt, or installing a custom ROM, this guide will walk you through the safest recovery methods while minimizing the risk of data loss.
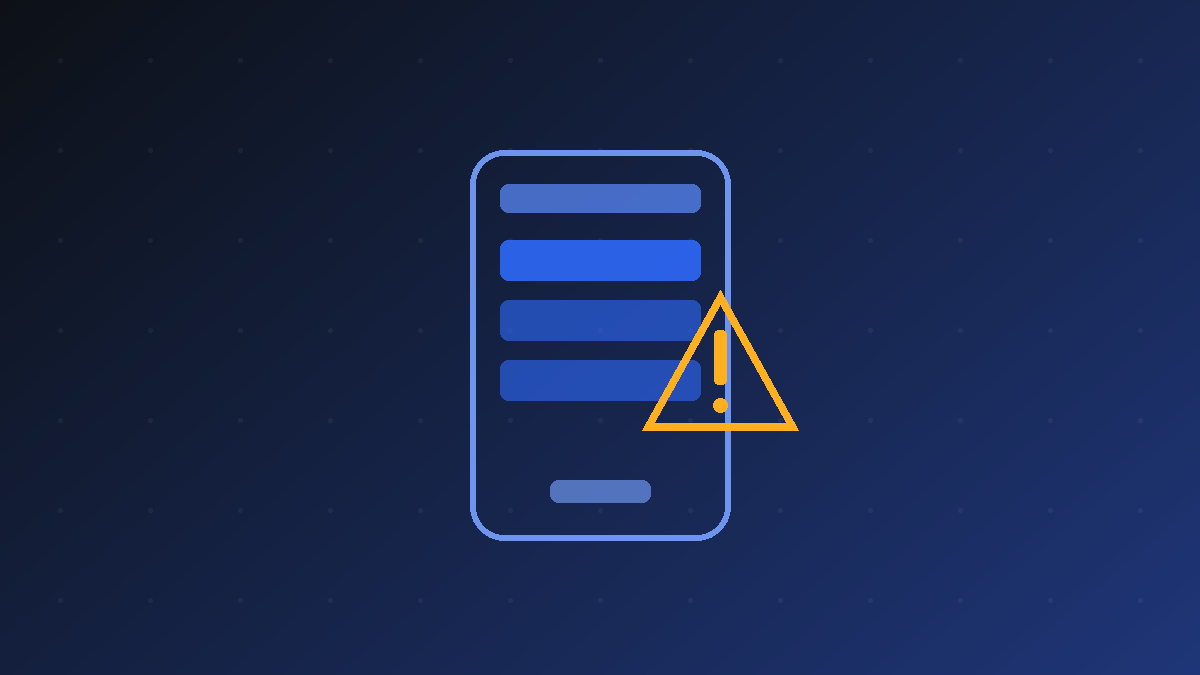
What Is “Secure Check Fail: Bootloader”?
When you power on an Android device, a security process called Verified Boot checks whether critical system files have been modified or corrupted before Android loads. If the bootloader detects a mismatch, it stops the startup process and displays:
Secure Check Fail: Bootloader
This is a security mechanism designed to prevent unauthorized or damaged firmware from loading. Android’s Verified Boot system and Samsung’s additional security layers help ensure firmware integrity during startup.
Typical Error Screen
SECURE CHECK FAIL : BOOTLOADERor
SECURE CHECK FAIL : recovery.imgor
SECURE CHECK FAIL : boot.imgThe exact wording varies depending on which component failed verification.
Infographic: Why This Error Happens
┌─────────────────────────────┐│ Android Device Powers On │└─────────────┬───────────────┘ │ ▼┌─────────────────────────────┐│ Bootloader Verifies Files │└─────────────┬───────────────┘ │ ┌───────┴───────┐ │ │ ▼ ▼ Files Match Files Don't Match │ │ ▼ ▼ Android Boots Secure Check Fail Normally Bootloader ErrorMost Common Causes
Understanding what triggered the error helps you choose the correct fix.
1. Interrupted Software Update
If a phone shuts down during an OTA update due to:
- Low battery
- Power failure
- Storage issues
- System crash
critical partitions may become corrupted.
Signs
- Error appears immediately after an update.
- Device gets stuck on Samsung logo.
- Endless reboot loop.
2. Flashing the Wrong Firmware
One of the most common causes.
Samsung firmware must match:
- Exact model number
- Region
- Carrier version
- Bootloader version
For example:
SM-G991U≠SM-G991U1Even though the phones appear similar, flashing the wrong package can trigger bootloader verification failures.
3. Bootloader Version Mismatch
Samsung does not allow bootloader downgrades.
Example:
Current version:
U6Attempting to install:
U4can immediately result in a Secure Check Fail error.
4. Failed Root or Magisk Installation
Many users encounter the issue after:
- Flashing Magisk patched boot images
- Installing custom kernels
- Modifying recovery partitions
- Rooting attempts
The bootloader detects altered files and blocks startup.
5. Custom Recovery Installation
Installing:
- TWRP
- OrangeFox
- Unofficial recoveries
on a locked bootloader often triggers the error.
6. Corrupted Firmware Download
A damaged firmware package may contain:
- Missing files
- Corrupted archives
- Incomplete downloads
This frequently leads to Odin flash failures.
7. USB Connection Problems
Many failed flashes occur because of:
- Faulty USB cables
- USB hubs
- Loose ports
- Driver interruptions
A connection drop during flashing can corrupt partitions.
Before Attempting Any Fix
Important Safety Checklist
Back Up Data If Possible
If recovery mode still works:
- Back up photos
- Export contacts
- Save important files
Some repair methods require a factory reset.
Charge the Battery
Recommended:
✅ Minimum: 50%
✅ Ideal: 70–100%
Never flash firmware on a nearly dead battery.
Verify Your Model Number
Check:
SM-XXXXfrom:
- Download Mode
- Recovery Mode
- Device box
Using firmware for a different model is one of the fastest ways to make the problem worse.
Quick Fixes Without a PC
Try these first.
Fix #1: Force Restart
Steps
- Hold: Power + Volume Down
- Keep holding for 10–15 seconds.
- Release when the screen turns off.
- Wait for reboot.
Sometimes the verification process fails temporarily and a restart resolves it.
Fix #2: Clear Cache Partition
Corrupted cache files can occasionally trigger startup issues.
Steps
- Enter Recovery Mode.
- Select:
Wipe Cache Partition- Confirm.
- Select:
Reboot System NowThis does not erase personal data.
Fix #3: Remove Recent Modifications
Ask yourself:
Did you recently:
- Install Magisk?
- Flash a kernel?
- Install TWRP?
- Modify system files?
If yes, restore stock images and remove the modification.
How to Enter Samsung Download Mode
Most Samsung repairs require Download Mode.
Common Method
- Turn off device.
- Hold:
Volume Down + Power- Follow on-screen instructions.
- Press Volume Up to continue.
Newer Samsung devices may require connecting a USB cable while holding volume buttons.
Infographic: Samsung Recovery Workflow
Secure Check Fail │ ▼ Can Device Enter Recovery? │ ┌──────┴───────┐ │ │Yes No │ │ ▼ ▼Wipe Cache Download Mode │ │ ▼ ▼Boot OK? Flash Firmware │ ▼FinishedFix #4: Flash Official Samsung Firmware Using Odin
This is the most effective solution.
What You’ll Need
- Windows PC
- Odin Tool
- Samsung USB Drivers
- Correct firmware package
Firmware Files Usually Include
BLAPCPCSCHOME_CSCUnderstanding Odin Slots
Odin SlotFileBLBootloaderAPSystem ImageCPModemCSCRegion SettingsHOME_CSCPreserve User Data
Flashing Procedure
Step 1
Download firmware matching:
- Model number
- Region
- Carrier
Step 2
Extract firmware files.
Step 3
Open Odin.
Step 4
Load:
BL → BL fileAP → AP fileCP → CP fileCSC → CSC fileStep 5
Connect device in Download Mode.
Step 6
Click:
StartStep 7
Wait until Odin displays:
PASSDo not disconnect the device during flashing.
Should You Use CSC or HOME_CSC?
HOME_CSC
Advantages:
- Preserves data
- Faster recovery
Disadvantages:
- May not fix severe corruption
CSC
Advantages:
- Clean installation
- Better stability
Disadvantages:
- Factory reset required
For major bootloader problems, CSC often provides better results.
Common Odin Errors Explained
ErrorMeaningSolutionFAIL (Auth)Invalid firmwareDownload correct firmwareFAIL (SHA256)Corrupted packageRe-download firmwareFAIL (Hidden.img)Partition mismatchUse correct region buildComplete(Write) FailedUSB issueChange cable/portSetup Connection StuckDriver issueReinstall drivers
Fix #5: Flash Factory Images Using Fastboot
For Pixel and some non-Samsung devices.
Requirements
- ADB installed
- Fastboot installed
- Correct factory image
General Process
- Boot into Fastboot Mode.
- Connect phone.
- Verify connection:
fastboot devices- Flash factory package.
- Reboot device.
Always verify device codename before flashing.
After Odin Says PASS But Phone Still Won’t Boot
This situation is surprisingly common.
Fix 1: Wipe Cache
Boot into Recovery Mode and clear cache.
Fix 2: Factory Reset
If cache doesn’t work:
Wipe Data / Factory ResetThis should be considered a last resort.
Fix 3: Reflash Firmware
Sometimes:
- Download was corrupted
- Files extracted incorrectly
- Firmware package incomplete
Re-download and flash again.
Why Samsung Bootloader Versions Matter
Samsung uses anti-rollback protection.
Example:
Current Bootloader = U8You can install:
U8U9U10But not:
U7U6U5Attempting to downgrade often results in:
SECURE CHECK FAILThis is one of the most overlooked causes of the error.
Signs of a Hardware Problem
If the error keeps returning despite using correct firmware, the issue may be hardware-related.
Possible causes:
- Failing UFS storage
- Damaged motherboard
- Corrupted memory sectors
- Water damage
Warning Signs
- Random restarts before failure
- Device overheating
- Extremely slow performance
- Frequent app crashes
If these symptoms existed before the bootloader error, software fixes may not be enough.
Stability Checklist After Repair
Once the phone boots normally:
Verify:
✅ Phone restarts normally
✅ No boot loops
✅ Camera works
✅ Calls function correctly
✅ Storage is detected properly
✅ Wi-Fi and Bluetooth connect
✅ Latest official update installs successfully
Samsung users should also verify whether any Knox-related warnings appear after modification attempts. Samsung’s security platform tracks certain bootloader and firmware changes.
Prevention Tips
Avoid repeating the same issue in the future.
Best Practices
- Download firmware only from trusted sources.
- Verify model numbers carefully.
- Never interrupt flashing.
- Keep battery above 70%.
- Avoid USB hubs.
- Use original cables whenever possible.
- Back up data regularly.
- Avoid mixing firmware files from different builds.
Frequently Asked Questions
Can I Fix Secure Check Fail Bootloader Without Losing Data?
Sometimes.
Using HOME_CSC on Samsung devices may preserve user data. However, severe partition corruption often requires a factory reset.
Is Rooting Always the Cause?
No.
Many users encounter this error after:
- Failed OTA updates
- Corrupted firmware downloads
- Interrupted flashing sessions
Rooting simply increases the chances.
Is It Safe to Ignore the Error?
No.
The device is refusing to boot because firmware verification failed. Continuing to force startup attempts won’t repair the underlying problem.
Should I Use Samsung Smart Switch?
Smart Switch is excellent for:
- Backups
- Restores
- Device migration
However, it rarely resolves bootloader signature verification failures by itself.
Do I Need to Unlock the Bootloader?
Not always.
Stock firmware can often be flashed while the bootloader remains locked. Unlocking is typically only required for:
- Custom ROMs
- Rooting
- Custom recoveries
Keep in mind that unlocking may erase data and affect certain security features depending on the device.
Final Verdict
The “Secure Check Fail: Bootloader” error looks serious, but in most cases it is recoverable. The key is identifying what triggered the verification failure and restoring the correct firmware.
For Samsung devices, the safest approach is usually:
- Verify your exact model number.
- Download matching stock firmware.
- Flash using Odin.
- Avoid mixing bootloader versions.
- Use reliable USB connections.
- Only unlock the bootloader if absolutely necessary.
If multiple flashes with verified firmware still fail, stop experimenting. Persistent Secure Check Fail errors can indicate storage failure, motherboard damage, or a model mismatch that software fixes cannot resolve.
Taking a cautious, methodical approach will dramatically increase your chances of restoring the device safely and avoiding permanent damage.Sites